time machine nas setup
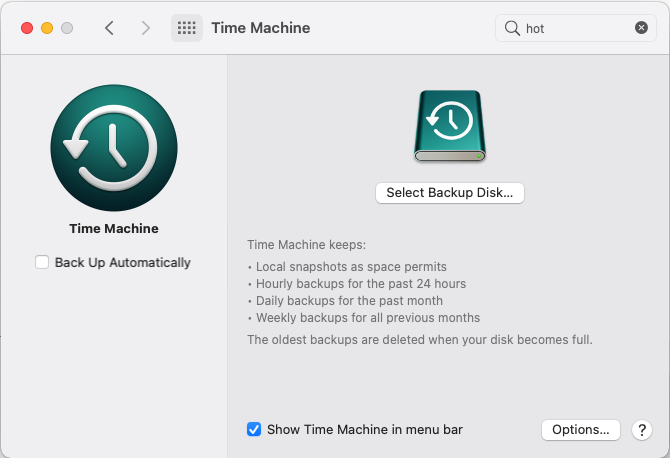
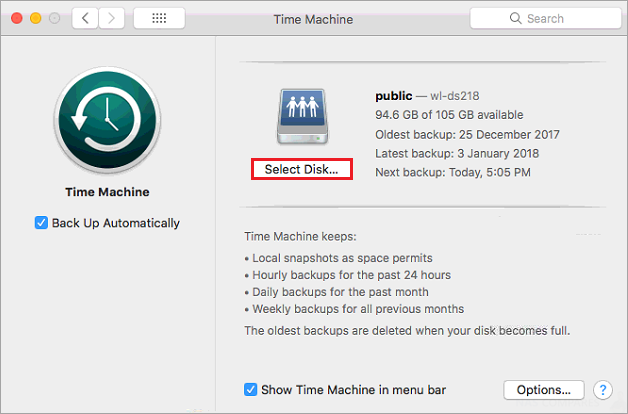
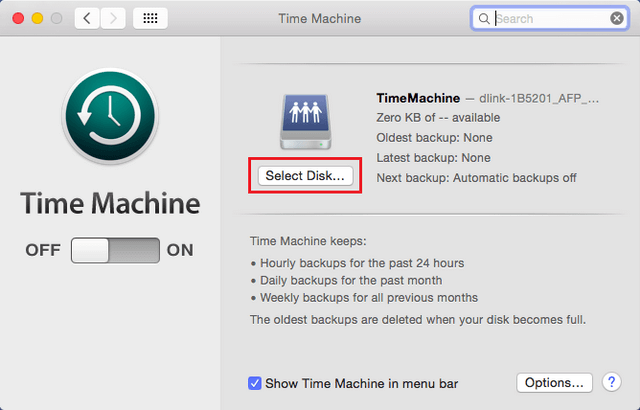
In Time Machine click on the Select Disk button. Im not sure of the reason why but I havent been able to kick Time Machine off just by specifying a network share.
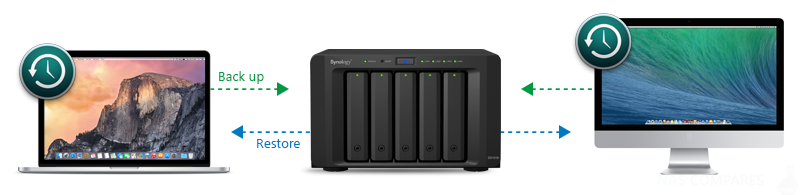
How Do I Back Up Files From My Mac To Synology Nas Using Time Machine Synology Tudaskozpont
Disktool -m your_entry.
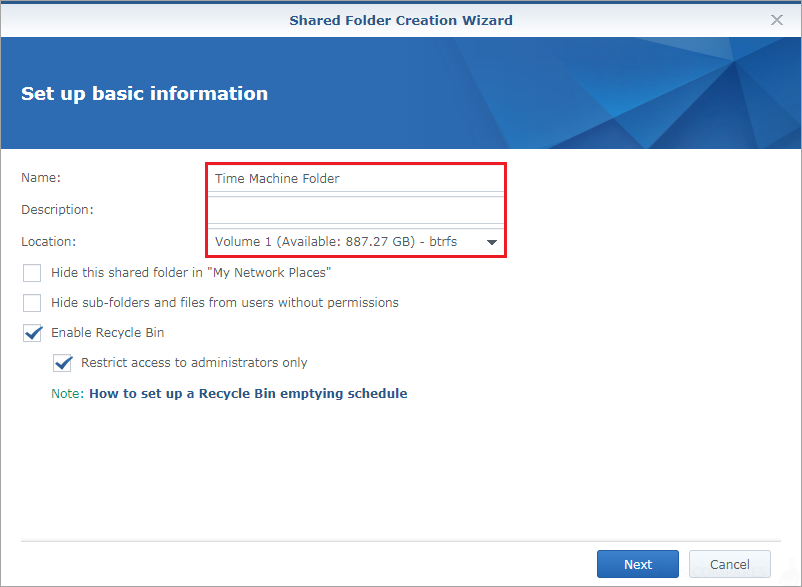
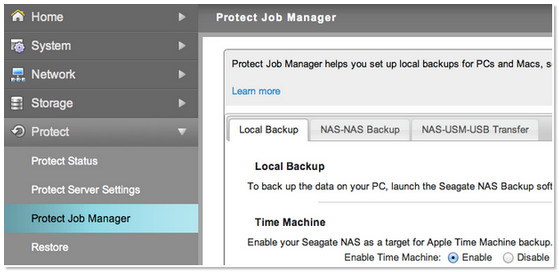
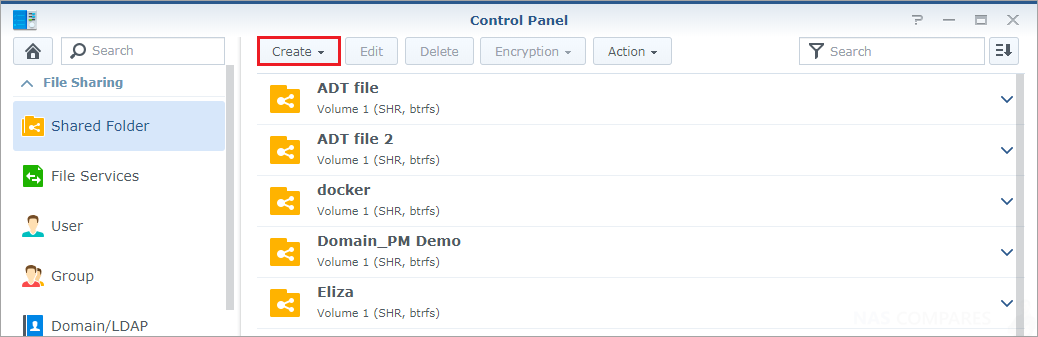
. AirPort Time Capsule or external drive connected to an AirPort Time capsule or AirPort Extreme Base Station 80211ac Follow these instructions to begin using Time Machine for backup purposes on your Mac. Open Control Panel User Create to open the User Creation Wizard. Write down the first entry and use it as a parameter replacing your_entry in the following command.
Select the ReadyNAS for Time Machine disk Bring up Time Machine on you Mac and click on Change Disk. From the list of services on the left select File Sharing. Select your previously created folder in our example TMBackup and then click on.
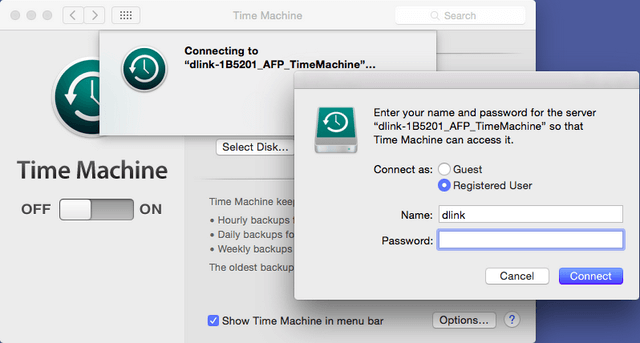
You connect to the dedicated shared. Time Machine NAS Selection On The Mac Next open up the Time Machine configuration in system preferences and click the select disk button. So can I do something like a Synology - is that still the one to get.
In macOS you will see your old backup. Use AFP or SMB according to your setting in the step 132. Heres a three-step process to create a Time Machine backup on a network-attached storage NAS unit.
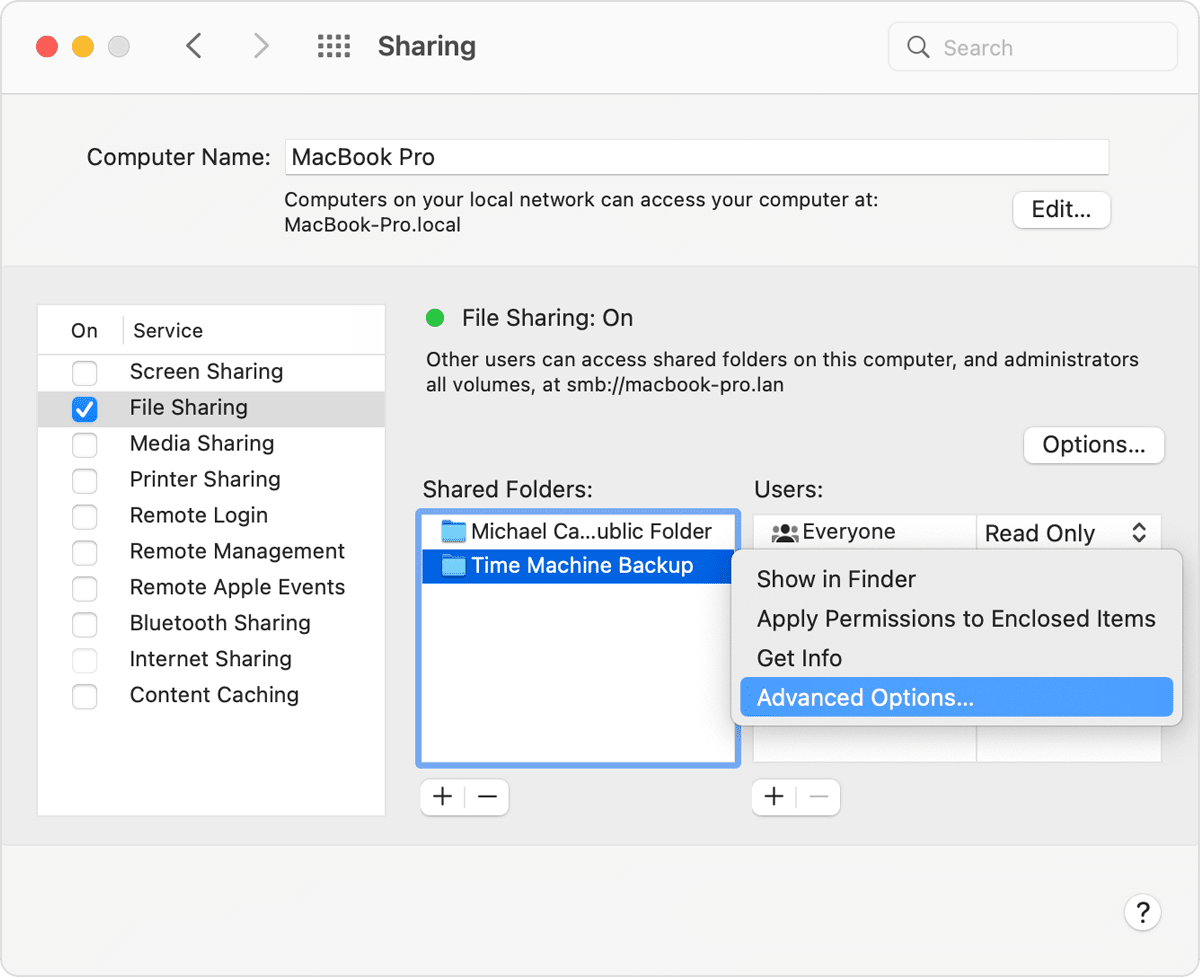
Im kind of a dumb dumb when it comes to this stuff. Control-click the folder that you added then choose Advanced Options from the. 22 Backing up data to your NAS using Time Machine.
Network-attached storage NAS device that supports Time Machine over SMB. Setting up the SMB Time Machine share. Select your TM root folder s Select one or more root folders that you want to use and click Apply.
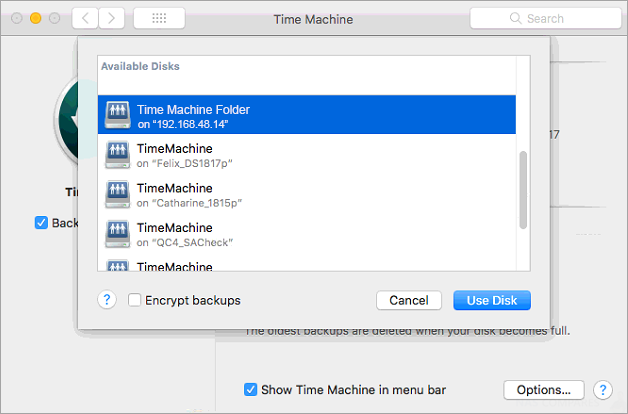
From the Apple menu select System Preferences and then select Time Machine. Setting up the SMB Time Machine share. Youll see the ReadyNAS in the available list.
When the setup is complete Time Machine will be able to start backing up data to the DiskStation. Then click Use Disk button. Mac shared as a Time Machine backup destination.
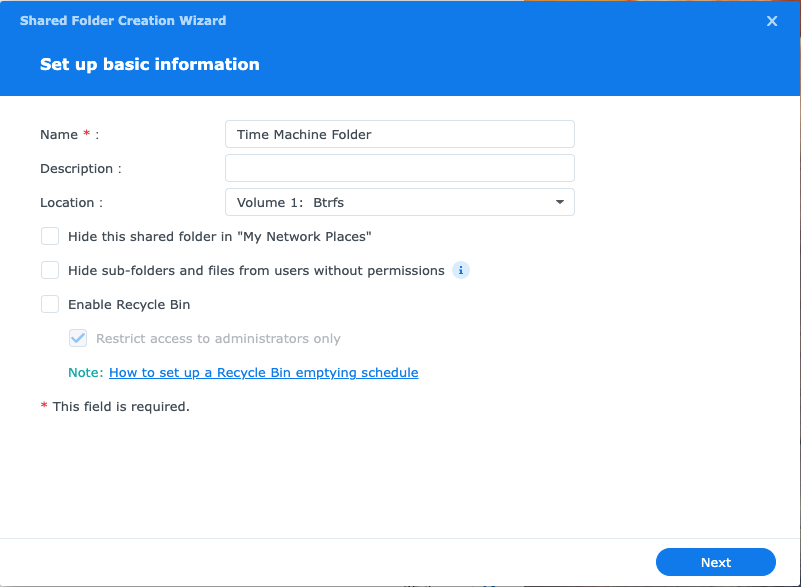
That is necessary because the Time Machine GUI still wont let you select the image you created for backups. Fill out the Name field with Time Machine without quotes and enter and confirm a desired password. Initial Setup Making everything work involves having a dataset configured for Time Machine to use a share that can be accessed over the network and a user account that can access everything.
Click next on the join groups page. TrueNAS will see there is already a dataset with your username and serve that up. On the Mac open the System Preferences and click Time Machine.
Connect user to NAS. Set up Time Machine on a NAS in three easy stepsApr 25 08 073000AM Contributed by. If you have set up the NAS file service to AFP instead of SMB replace smb with afp in the command above.
User ID and Password will be asked to connect to the FreeNAS. Easy to set up and manage this two-bay NAS features hardware encryption media. Click Edit configure the target folder.
Notice in the screenshot above that I saved three different syntaxes for the same server. Go to the Advanced tab and tick the Enable Bonjour Time Machine broadcast via SMB or Enable Bonjour Time Machine broadcast via AFP checkbox. Time Machine defaults to the nas_namelocal syntax.
Control-click the folder that you added then choose Advanced Options from the. Create a sparsebundle image on your local system. Select the folder you wish to use for Time Machine and click OK.
A screen as shown will appear. 21 Connect to your NAS server On your Mac click Go in the top menu bar and select Connect to Server. Would anyone be able to help me with how I can setup a NAS based hard drive preferable a RAID setup where I can backup 2x Macs and one Windows computer through my Alien.
Enter the address of your NAS server. Some brand name NAS machines work others dont. Connect Time Machine to NAS.
Configure Your Mac Stop Time Machine backup. To do this click the big Set Time Machine Folders button notice that it says folder s not folder and once you do you should get a list of all the shared folders on your NAS. Close Terminal and proceed as normal with your installation.
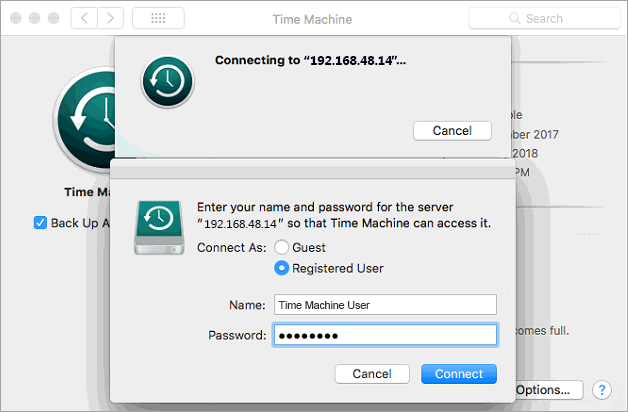
How To Back Up Your Mac To Synology Nas With Time Machine Nas Compares Go to the BackupTime Machine tab select the checkbox enter a password for the Time Machine user ReadyNAS and the capacity that you wish to limit Time. Click Browse to bring up a list of folders. Next you get the authentication screen.
I started by making an account on TrueNAS that matched the username and password of the MacOS laptop. The next step is to make a connection from the Mac to your NAS. If all is well on the ReadyNAS then you should see it in the selection window.
After specifying the address click Connect. Find the entry containing your NAS mountpoint. When asked to resume from a Time Machine backup choose the network disk.
From the Shared Folders list on the right click the add button then choose a folder to use for Time Machine backups. Choose the shared folder that you just created from the Time Machine menu and save your settings. Time Machine user accounts.
On the assign shared folders permissions page. Synology DiskStation DS220 Best NAS for most home users. Select the newly created Disk on the FreeNAS system.
If you already use Time Machine to back up your Mac to another device I suggest you stop Time. Go to the BackupTime Machine tab select the checkbox enter a password for the Time Machine user ReadyNAS and the capacity that you wish to limit Time Machine to. The parent folder of the Time Machine dataset in my case mntNewPool Connect to the new share from macOS.
From the Settings screen go to the Backup tab and click the button to the right of Time Machine to configure the service. Time Machine setup with a NAS - How to. With this you can use any SMB share for Time Machine backups your SMB share and time.
Step 1. Click Select Backup Disk button to configure the Disk. You have the ability to set a maximum space quota for Time Machine backups on the NAS in the field below.
Then click on the Set Time Machine Folders button. It should the Target Folder as Not Configured. Add a new SMB share with.
I want to to use my AVM router for backups but the application wont let me. Perform Time Machine Backup to your Synology NAS.
How To Back Up Your Mac To Synology Nas With Time Machine Nas Compares

Image Alchemist Time Machine Backup To Synology Nas Image Alchemist
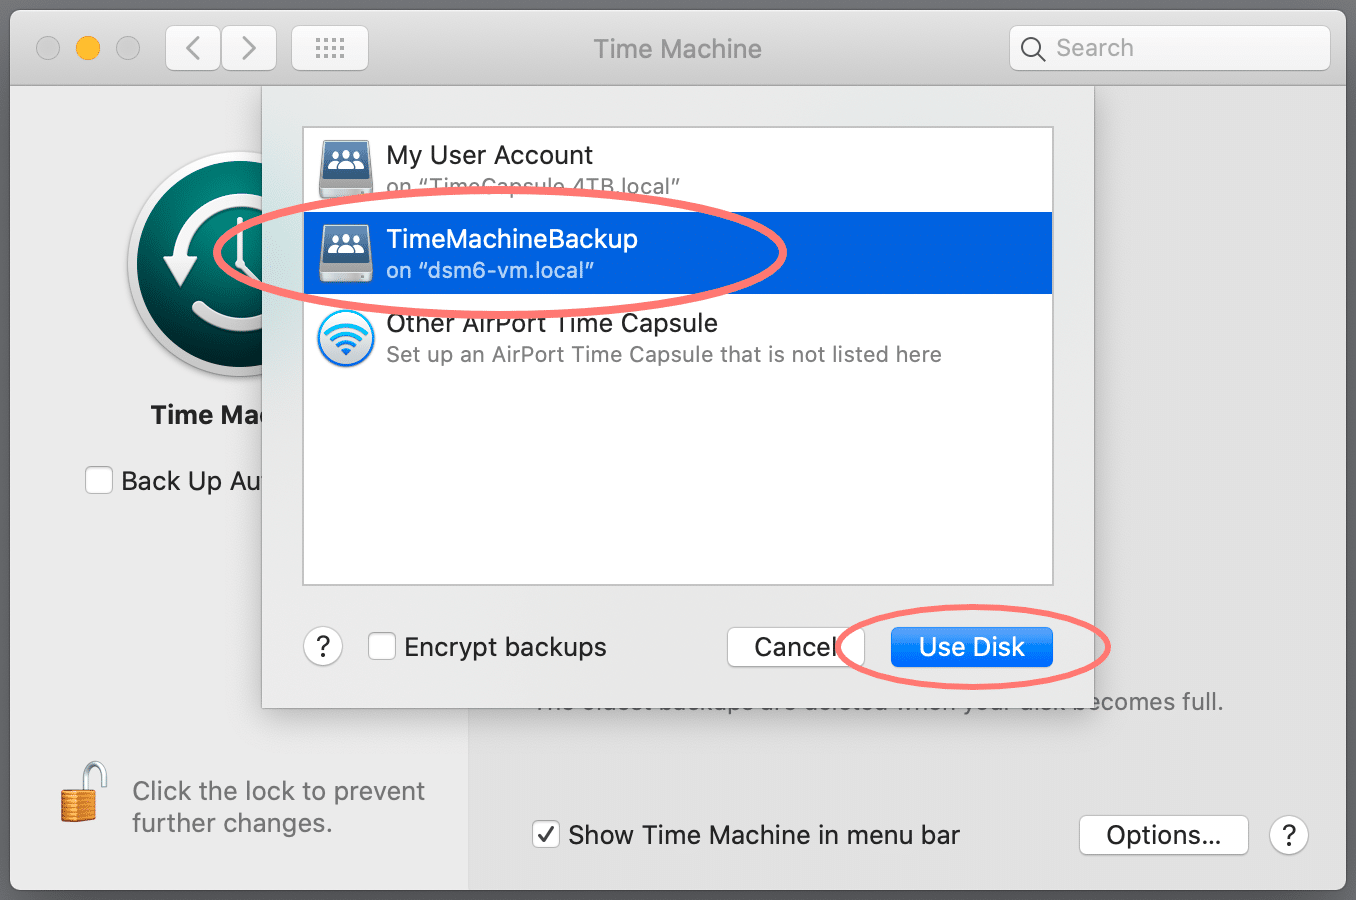
Image Alchemist Time Machine Backup To Synology Nas Image Alchemist
Business Storage Nas How To Back Up With Time Machine Backup Seagate Support Uk

How Do I Back Up Files From My Mac To Synology Nas Using Time Machine Synology Tudaskozpont
How To Back Up Your Mac To Qnap Nas With Time Machine Nas Compares
Backup Disks You Can Use With Time Machine Apple Support In

Time Machine Best Practice Asustor Nas
How Do I Setup Time Machine On Dns And Mac Os X D Link Uk
How To Back Up Your Mac To Synology Nas With Time Machine Nas Compares
How To Back Up Your Mac To Synology Nas With Time Machine Nas Compares
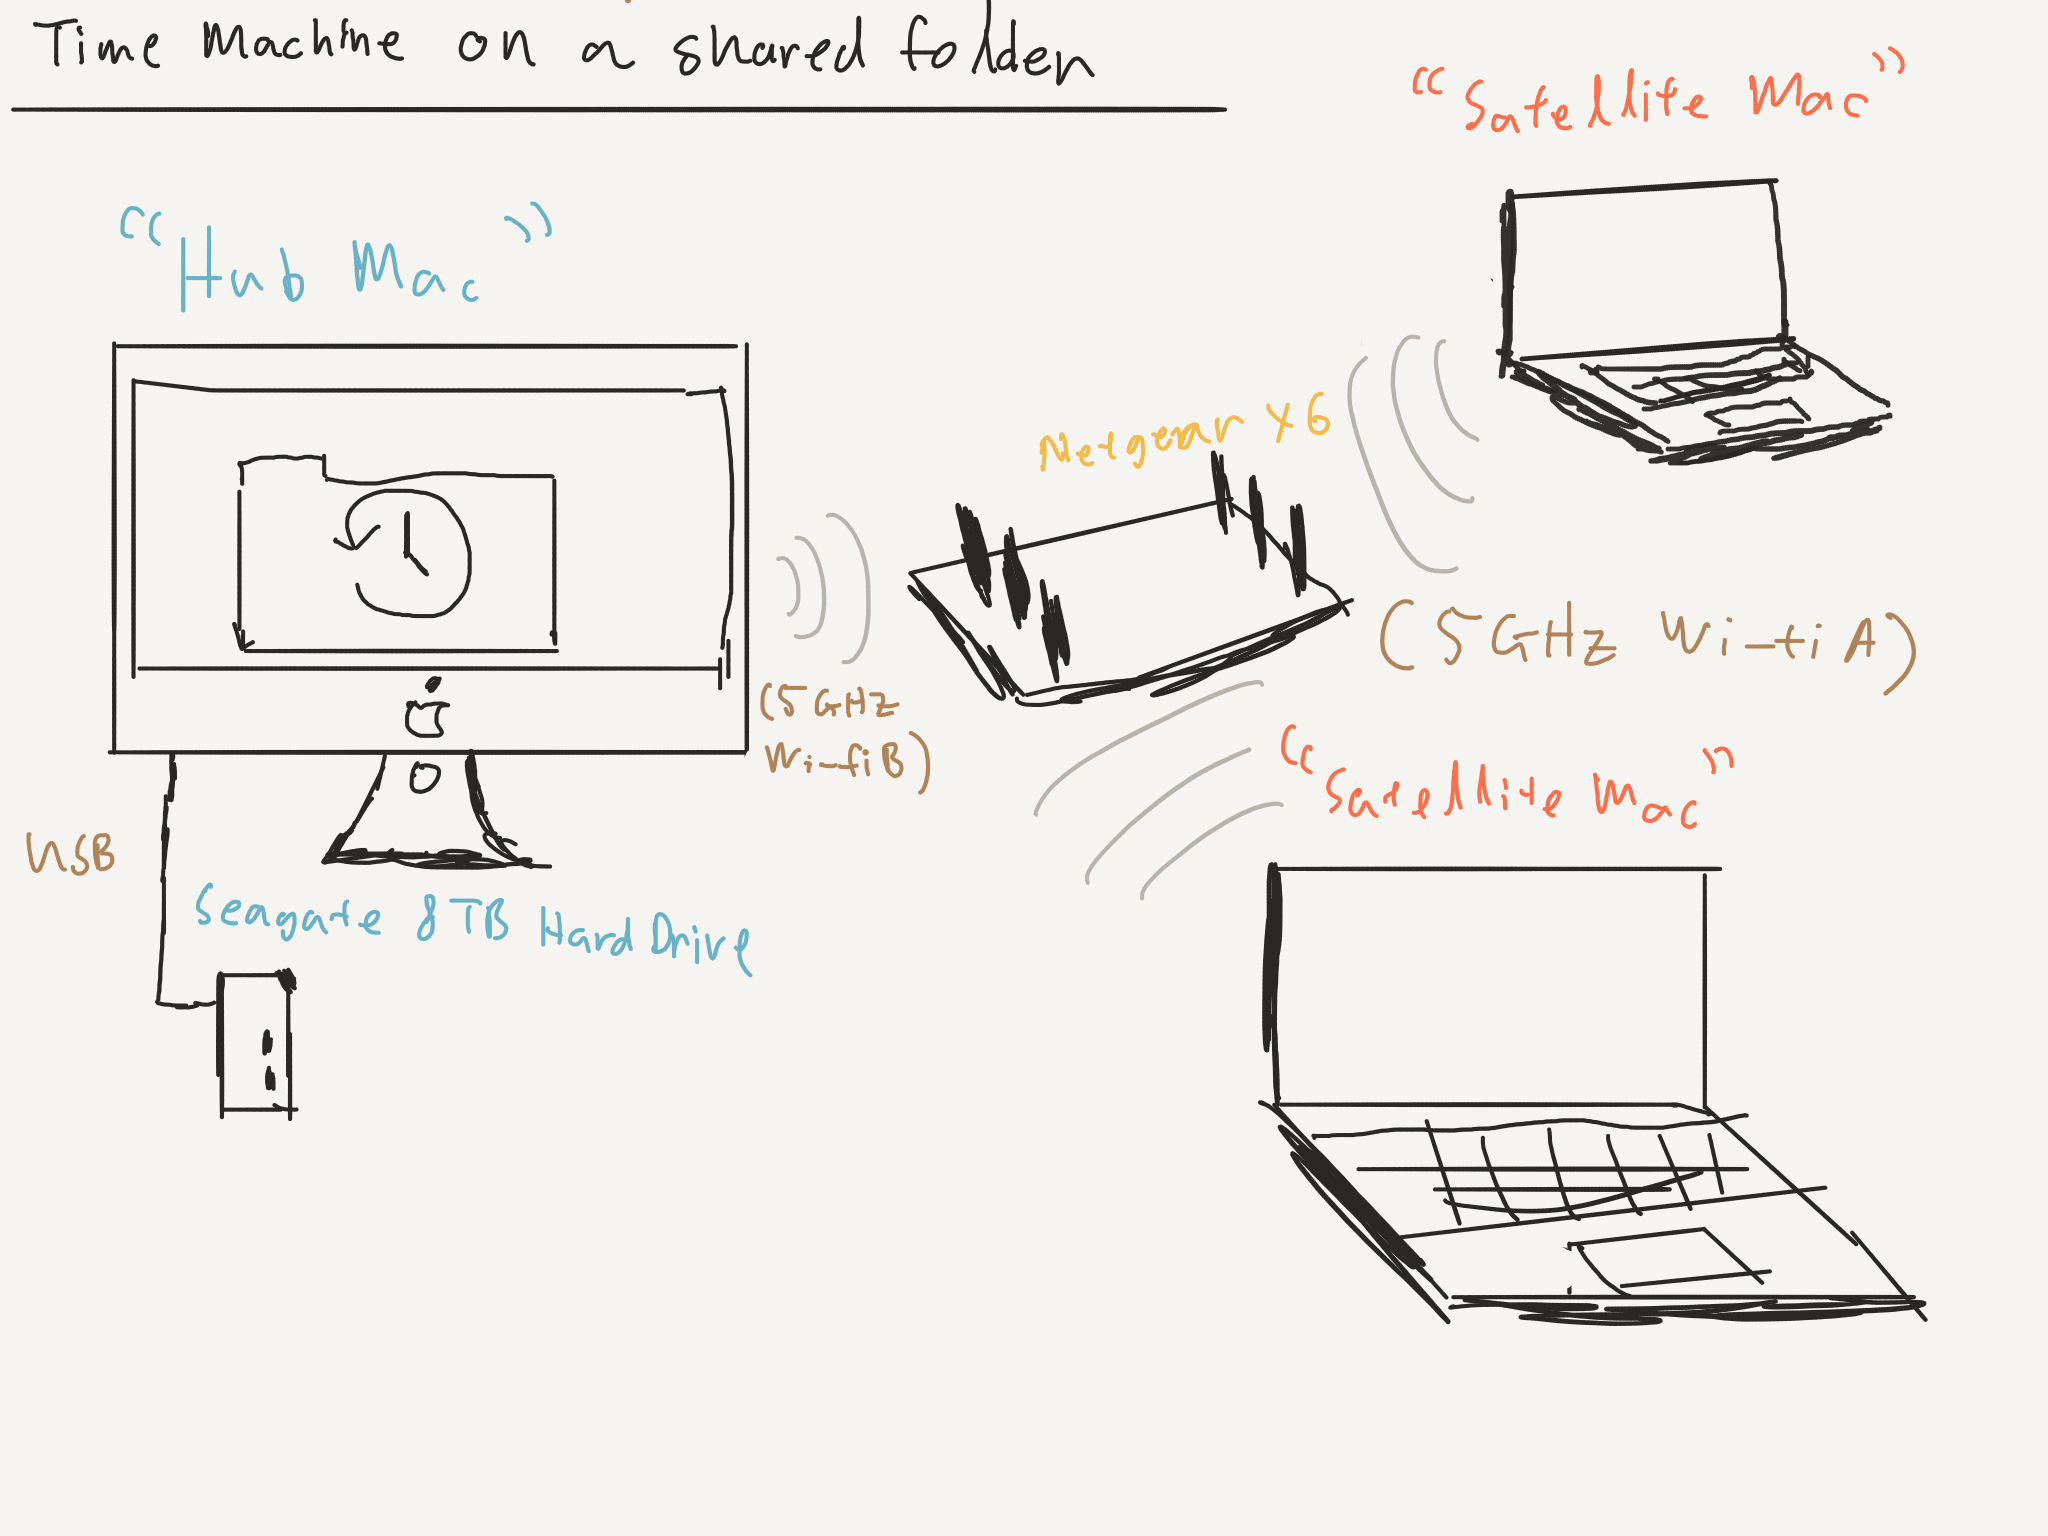
How To Set Up A Shared Time Machine Backup Drive In Macos High Sierra Nk

Quick Guide Easy Time Machine Backup To Any Nas Youtube

How To Set Up A Time Machine Backup On A Mac
How To Back Up Your Mac To Synology Nas With Time Machine Nas Compares
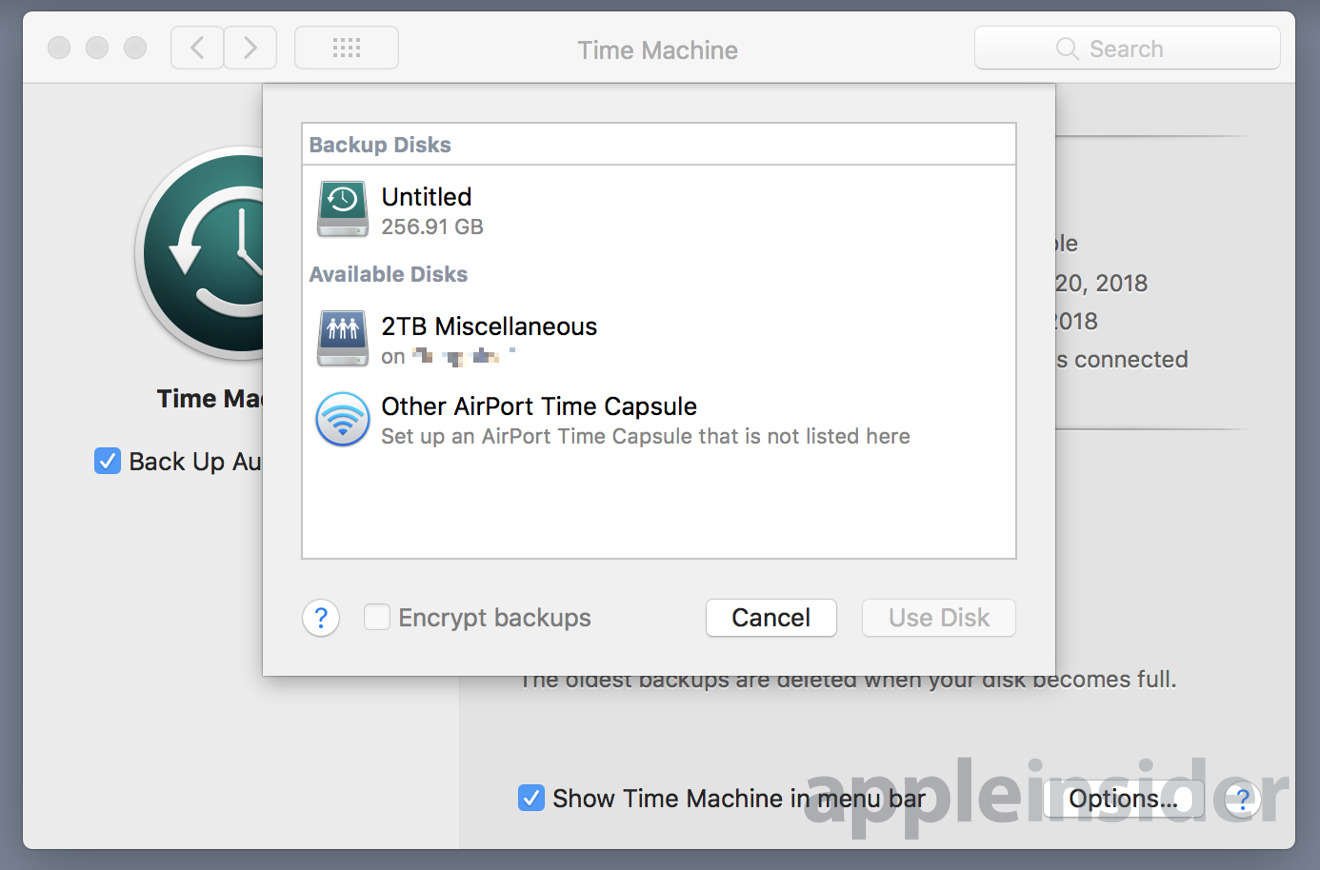
How To Use An Unsupported Nas Or A Spare Mac On Your Network As Storage For Time Machine Backups Appleinsider
How To Back Up Your Mac To Synology Nas With Time Machine Nas Compares
How Do I Back Up Files From My Mac To Synology Nas Using Time Machine Synology Tudaskozpont
How Do I Setup Time Machine On Dns And Mac Os X D Link Uk